
"Fireworks"
To end in style, I chose a willow in the woodland in my local patch “Het Reggedal”. Only this willow still had beautifully colored autumn leaves at that time, while the rest of the trees had lost their leaves already. At that time it was a gray day and not completely dry. The wet weather that morning brought out the colors of the last leaves and the dark trunks beautifully.
When taking landscape images, I always use my tripod and cable release to create an image as slowly as possible. While I was making this image I thought “okay great” but not “wow”. In my experience, there was something missing in this image, such as nice light, a bit of fog, or fill in that gap according to your own taste.
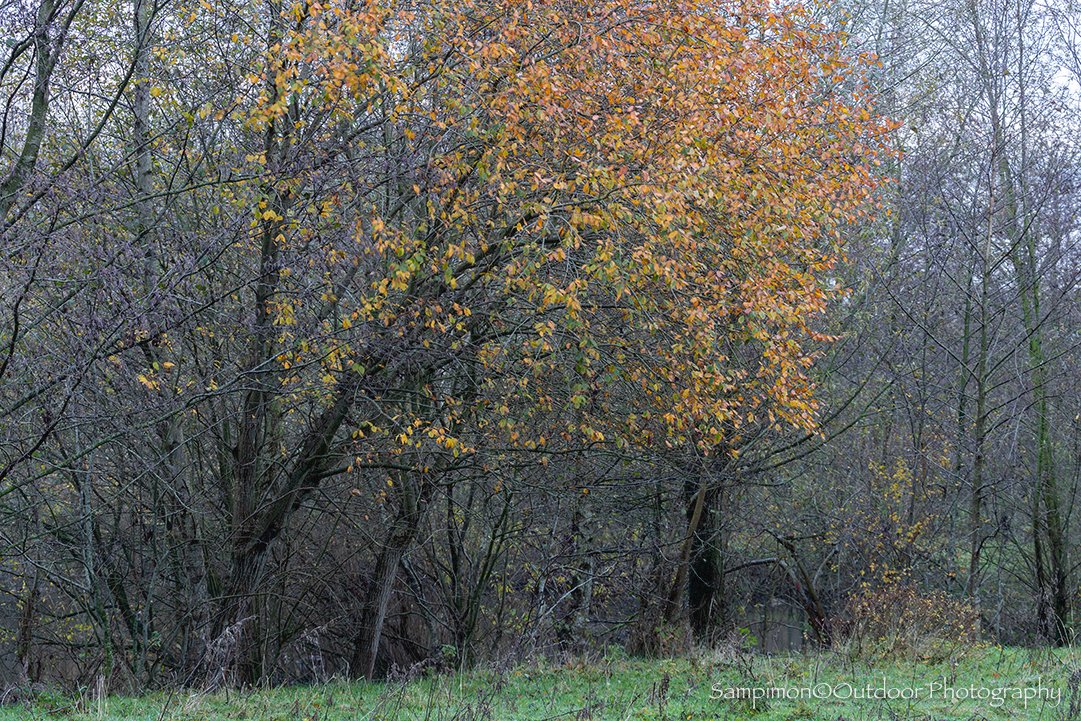
Raw image “Fireworks”. Iso 100 - 130 mm - f/8 - 2.0 sec.
What was missing for me was the picturesque atmosphere which I had already in mind while I was composing this scenery. For this image I have tried to create the painterly, moody atmosphere by taking multiple images of this intimate woodland. During the entire process, the painterly atmosphere became finally visible and I created the story behind the image. The darkness of the night in this image was characterized by the trunks and branches, the beautiful colors of the leaves as a representation of the fireworks during New Year's Eve.

Final image “Fireworks”.
How did I create this image? Actually quite simple but also somewhat complex. Over the past year I have studied more in depth the technique of multiple exposure and intentional camera movement (ICM). A particularly fun and inspiring technique that seems simple, but is not that easy to create striking images. For the record I am only a beginner but gaining experience requires a lot of time, practice, patience and presentation. Inspired by the images of Pep Ventosa, the originally Spanish photographer/artist, I taught myself a technique to capture 6 to 10 images of a subject (trees/landscapes) and combine them on the basis of layers in Photoshop (PS). Of course, this merge is also possible in my camera, but then I miss the control that I have in PS. Merging and aligning the images takes much more time than my normal editing of an image in PS. For me, this extra time is the deepening layer in photography to add something to an image, which in my case creates the painterly/moody effect.
You could perhaps describe my technique as “dancing with a subject, in my case with trees”, although this sounds quite vague now that I write it down like this. In the coming year I will try to refine this technique and express it more in words and images. I am aware that not everyone likes this form of photography, but that is not a problem for me. Do what makes you happy or inspired you is my way of life.
In addition to the willow above, I have also tried this “dance” on a number of oak trees in my local patch “Het Reggedal”.

Watching oak trees on the bank of the river Regge. ISO 100 - 220 mm - f/8 - 4.0 sec.

Fire. ISO 100 - 170 mm - f/11 - 1/6 sec.

Dancing trees. ISO 100 - 330 mm - f/11 - 1/8 sec.
With this method of photography and editing (merging) I have found once again an opportunity to create something special from nothing special like the idea of Camille Pissaro; try to see beautiful things in humble places where other people see nothing.
Finally, I would like to thank you for your time, likes, comments and nice words!
More images in my ICM gallery.
Enjoy!
Otlis Sampimon Outdoor Photography
Autumn
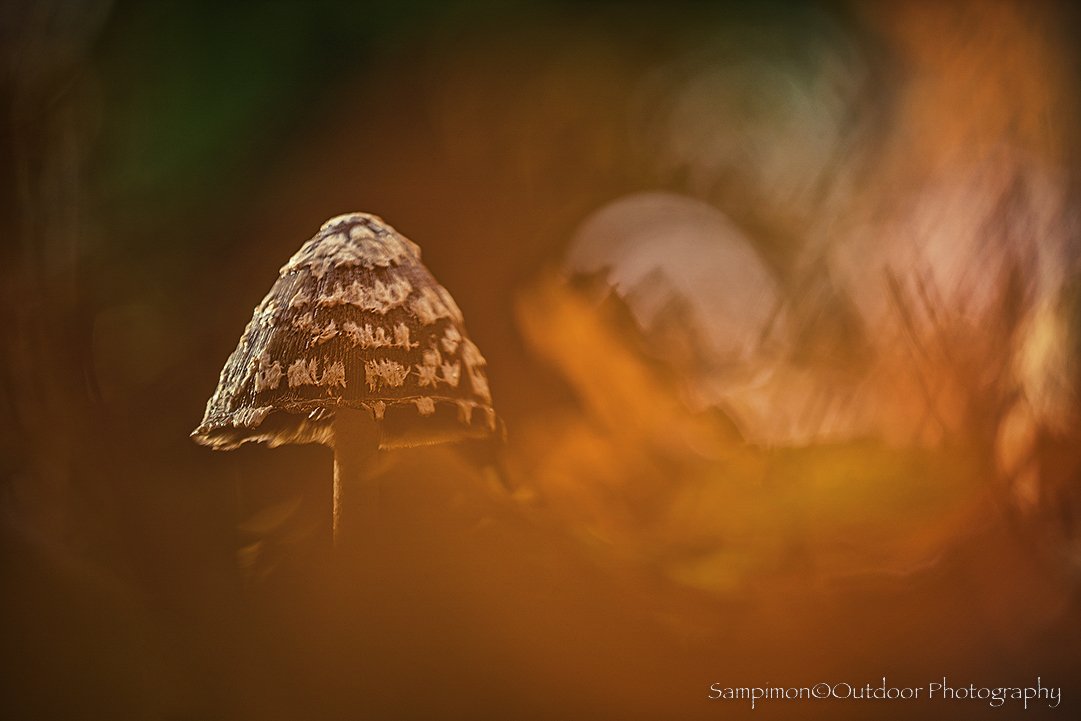
Magpie inkcap in dreamy conditions. ISO 100 - 180 mm - f/3.5 - 1/50 sec.
The leaves are changing color, the serviceberry trees are a deep red, the red oak trees are orange red and the birches are slowly turning into golden yellow colors. On the forest floor it is a party of colored leaves and splurges of mushrooms. It seems this year after the dry summer that the toadstools have done their best after a few rain showers. In my local patch under a few red oak trees, the Magpie inkcap (Coprinus picaceus) grow every year. This beautiful toadstools with a brown conical hat covers with white spots (velum), that's what gives this toadstool its name in dutch “spechtinktzwam” because the spots resemble the plumage of the great spotted woodpecker (Wikipedia). This color scheme stood out well among the leaves of the red oaks.

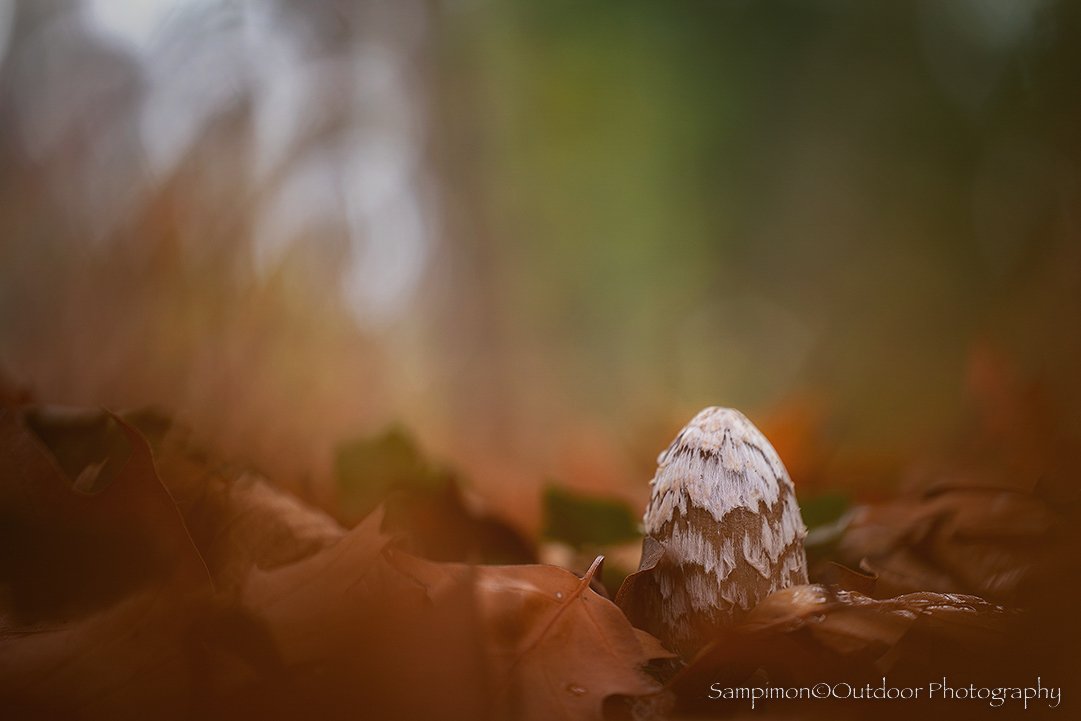
Young magpie almost covered with leaves of the red oak tree. ISO 160 - 180 mm - f/3.5 - 1/60 sec.
The advantage of this subject is that toadstools stands patiently and you have the opportunity to look at it from all sides and then determine the best composition and then make the image. This seems simple, but I still need the necessary time to finish with a satisfied image. To make an image that I am satisfied with, I need peace of mind and that is unfortunately not always present, so I like to go back when it is a bit quieter in my head. I think this is great advice to photograph a subject several times in a short time, learning by doing is my mantra.

behind the scenes
For photographing toadstools I now also use my Benro Bat tripod, a nice tool with the center column which is ideal for placing the camera at a low view point. As for the lenses, I use both my 180mm macro lens and my Laowa 100mm lens. For this Laowa lens I have adjusted the tripod collar a bit so that it stays in place around the lens so that it can be properly attached under the center column with ball head. When shooting toadstools I try to place the lens between the leaves so that you get a soft dreamy foreground. If possible, I try to slightly upwards the lens so that you can include the light circles (bokeh) through the foliage in the image. When the foliage already has some color, that completes the image as far as I'm concerned.
Final image of the magpie inkcap displayed in the video above. ISO 100 - 100 mm - f/2.8 - 1/40 sec.
The above method is quite a challenge for me because I try to go beyond the recording image, however there is nothing wrong with making that kind of image. The dreamy character or shooting into the sun with an red oak tree leaf in front of the lens so that only the silhouette is visible, are possibilities that I like to try out. Trial and error in other words just do it over and over again until you are satisfied. The details in the ink drops or the stains on the hat also lend themselves well to abstract images. I'm not completely satisfied with the latter yet and this part need some practice. To be continued!
More images in the “Toadstools” gallery.
Enjoy!
Otlis Sampimon Outdoor Photography
Look with fresh eyes
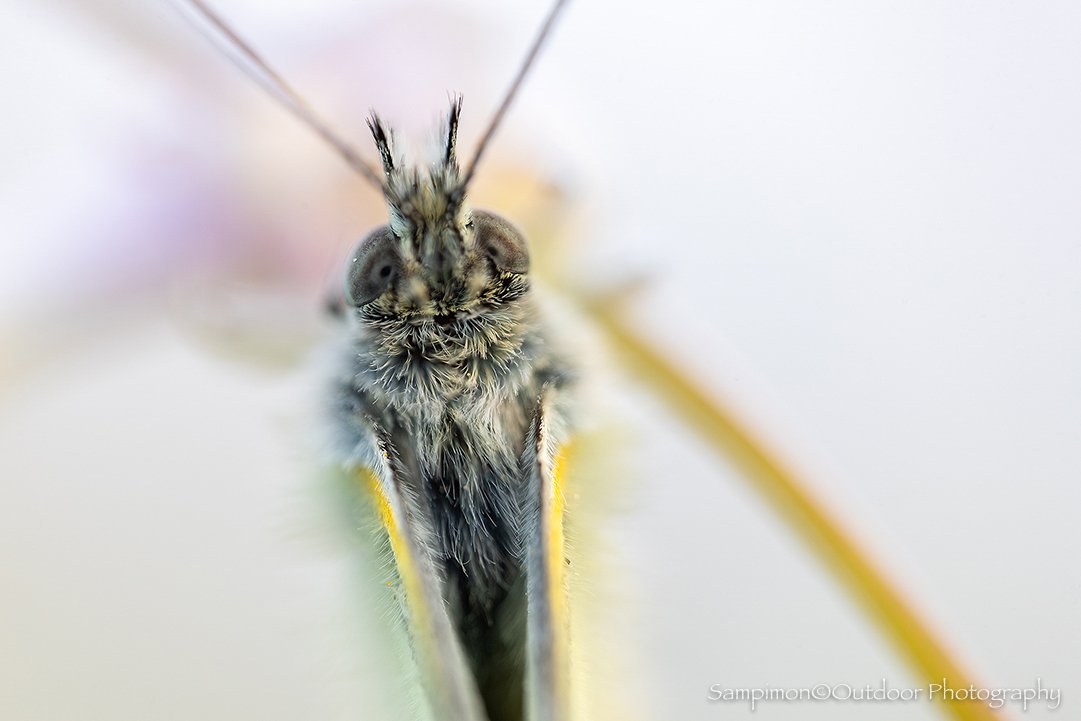
Fresh eyes of the small veined white. ISO 100 mm - f/2.8 - 1/15 sec.
Every year on social media I saw beautiful images of orange tips and small veined whites hanging or sitting in fields with cuckoo flowers, but unfortunately I wasn't that lucky yet in my local patch “Het Reggedal”. However, in April of this year I walked our dog early in the morning and to my surprise saw an orange tip sitting on top of a cuckoo flower in the park. At that moment a rush of adrenalin flew through my body and I finished my round earlier than normal and went back with my camera and tripod. Luck was on my side the orange tip was still in the same place and I was able to take my first picture of this beautiful butterfly. Of course I made many images that were not all equally beautiful, but it taught me to look differently at these butterflies in the field.

My first image of a orange tip sitting on the cuckoo flower in my local park. ISO 100 - 180 mm - f/3.5 - 1/400.
After my first finding of the orange tip, I found this butterfly more than once while walking the dog, if it was the same butterfly, I don't know, but learning to look paid off and for the first time I found in my local patch “Het Reggedal” the small veined white covered with dew around sunrise. And the following early mornings I was regularly successful in finding these butterflies on the blooming cuckoo flowers.
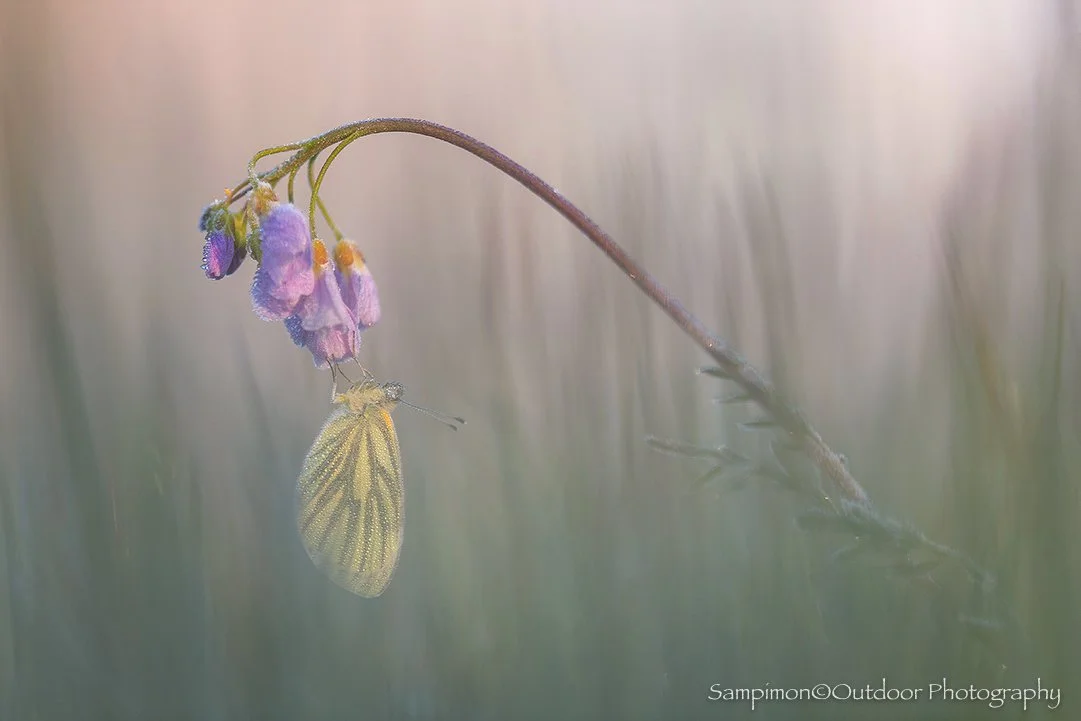
Small veined white covered in dew around sunrise. ISO 100 - 180 mm - f/3.5 - 1/125 sec.

Behind the scenes
How I made my images is not that exciting, but it is a time-consuming activity. When shooting these images I always use my tripod, inverting the center column so that the camera can be placed as low as possible. First I used my old Manfrotto tripod, but I recently replaced it with the Bat tripod from Benro. This tripod has the option of folding the legs so that the center column can easily be used above and below. With some images I have used a piece of plastic in front of the lens to create a haze at the bottom of the image, sometimes that adds something to the image and sometimes it doesn't. So it is trial and error in the field is my advice. When I want to capture more detail of the butterfly, I also use my Nisi's photo rail to be able to focus to the millimeter. When I'm doing this I imagine myself in the world of my subject and I have seen details in the dewy eyes and wings of the butterfly that I had never seen before. A wonderful voyage of discovery that requires more in-depth knowledge.
Finally, my principle is where I find the butterfly I create my image. I never move the butterfly, damselfly or dragonfly and I try to make the image background, as calm or as exciting as possible. When blades of grass in the background disturb the image, I bend or cut them away with my wallpaper scissors if possible. If the image remains too restless, I look further and try again. This way of photographing is the challenge for me and gives me great satisfaction when I succeed in making an image of an orange tip at sunrise in a natural setting. The edge of dew around the butterfly is the finishing touch.

Orange tip at sun rise covered in dew. ISO 100 - 100 mm - f/2.8 - 1/250 sec.
My journey continue to marvel and try to look with fresh eyes at "normal" subjects such as the orange tip and the small veined white.
More images in the gallery “Insects”.
Enjoy!
Otlis Sampimon Outdoor Photography
Painting with light on a cold morning

Snake’s head covered with frost catching the first rays of sun light. ISO 400 - 180 mm - f/3.5 - 1/1000 sec.
The Snake’s head flowers are one of my favorite spring bloomers. Unfortunately, these beautiful flowers are not available in my local patch “Het Reggedal”. For these flowers I have to drive three quarters of an hour to “Het Vechtdal” nearby Zwolle. The place where you can find these beautiful flowers is not special with a lot of noice of trucks and cars in the background and in the area orange-red ditches with a high iron content. Below is an image of one of the ditches.

The ditch with the orange red color with a Snake’s head flower covered in frost.

Behind the scenes
For the images I use my Manfrotto tripod with center console that I use upside down so that the camera is placed under the tripod, see photo on the left. I also take quite some distance from the flower and place my 180 mm macro lens as low as possible in the frozen/dewy grass. This low position creates a nice soft foreground with a slightly bluish glow caused by the frost on the grass. By shuffling the setup a bit and using live view to assess the composition and the softness of the image, I arrange quite some time until I am satisfied. In addition to make the composition, you also need some luck, especially with the light on the flower. When the latter doesn't quite work out, I try my luck with the next flower.
When I photograph the Snake’s head flowers, the cold nights with frost and dew are my favorite ingredients, this means setting the alarm early (4.30 AM) to be at the spot well before sunrise. I need this early time to find some nice flowers to photograph them around sunrise or shortly after. The first rays of the sun on the flower and the warm background through the orange-red of the ditch are my ingredients for a beautiful image. The finishing touch is the wallpaper scissor with which I can carefully remove blades of grass that do not fit into the composition. This means that you cannot take very many images in the half hour before sunrise until about 2 hours after sunrise.

Beautiful colors of the ditch in the background and a Snake’s head covered with dew. ISO 100 - 180 mm - f/3.5 - 1/125 sec.
Taking these kinds of images is a wet activity because of the frost and dew and that is also the reason that I always wear rain pants so that I can move freely behind the camera without getting wet and cold.
More images in the gallery “Plants”.
Enjoy!
Otlis Sampimon Outdoor Photography
Abstract ice structures

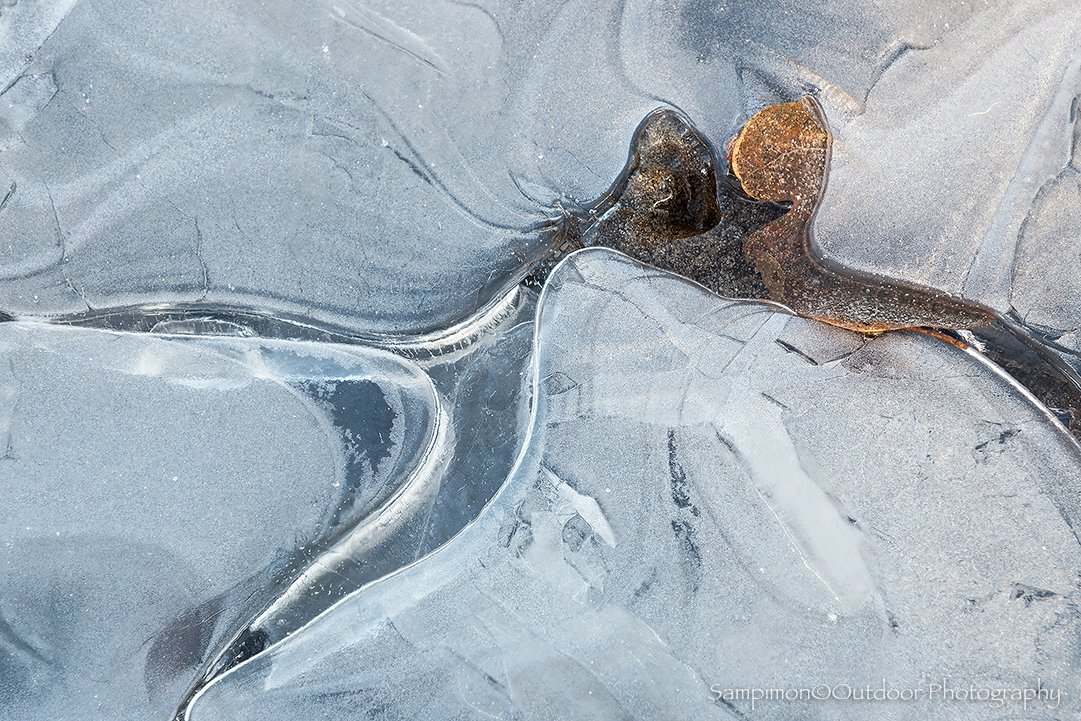
Mammoth in ice. ISO 100 - 180 mm - f/14 - 1/4 sec.
The winter of 2021/2022 is not over yet, but unfortunately we have not had many winter conditions yet. A few days with hoarfrost were fantastic and I was able to make some beautiful images of birches in my local patch “Het Wierdenseveld”. Due to the few nights with frost to -8 degrees below zero, it was possible to photograph abstract structures in ice. For this subject it is important that it had rained before the nights of frost and that shallow puddles were formed. After a few nights of frost the puddles were completely frozen which means that there is virtually no water left and that the ice gets the nice white color with some dark lines and bubbles.
Behind the scenes
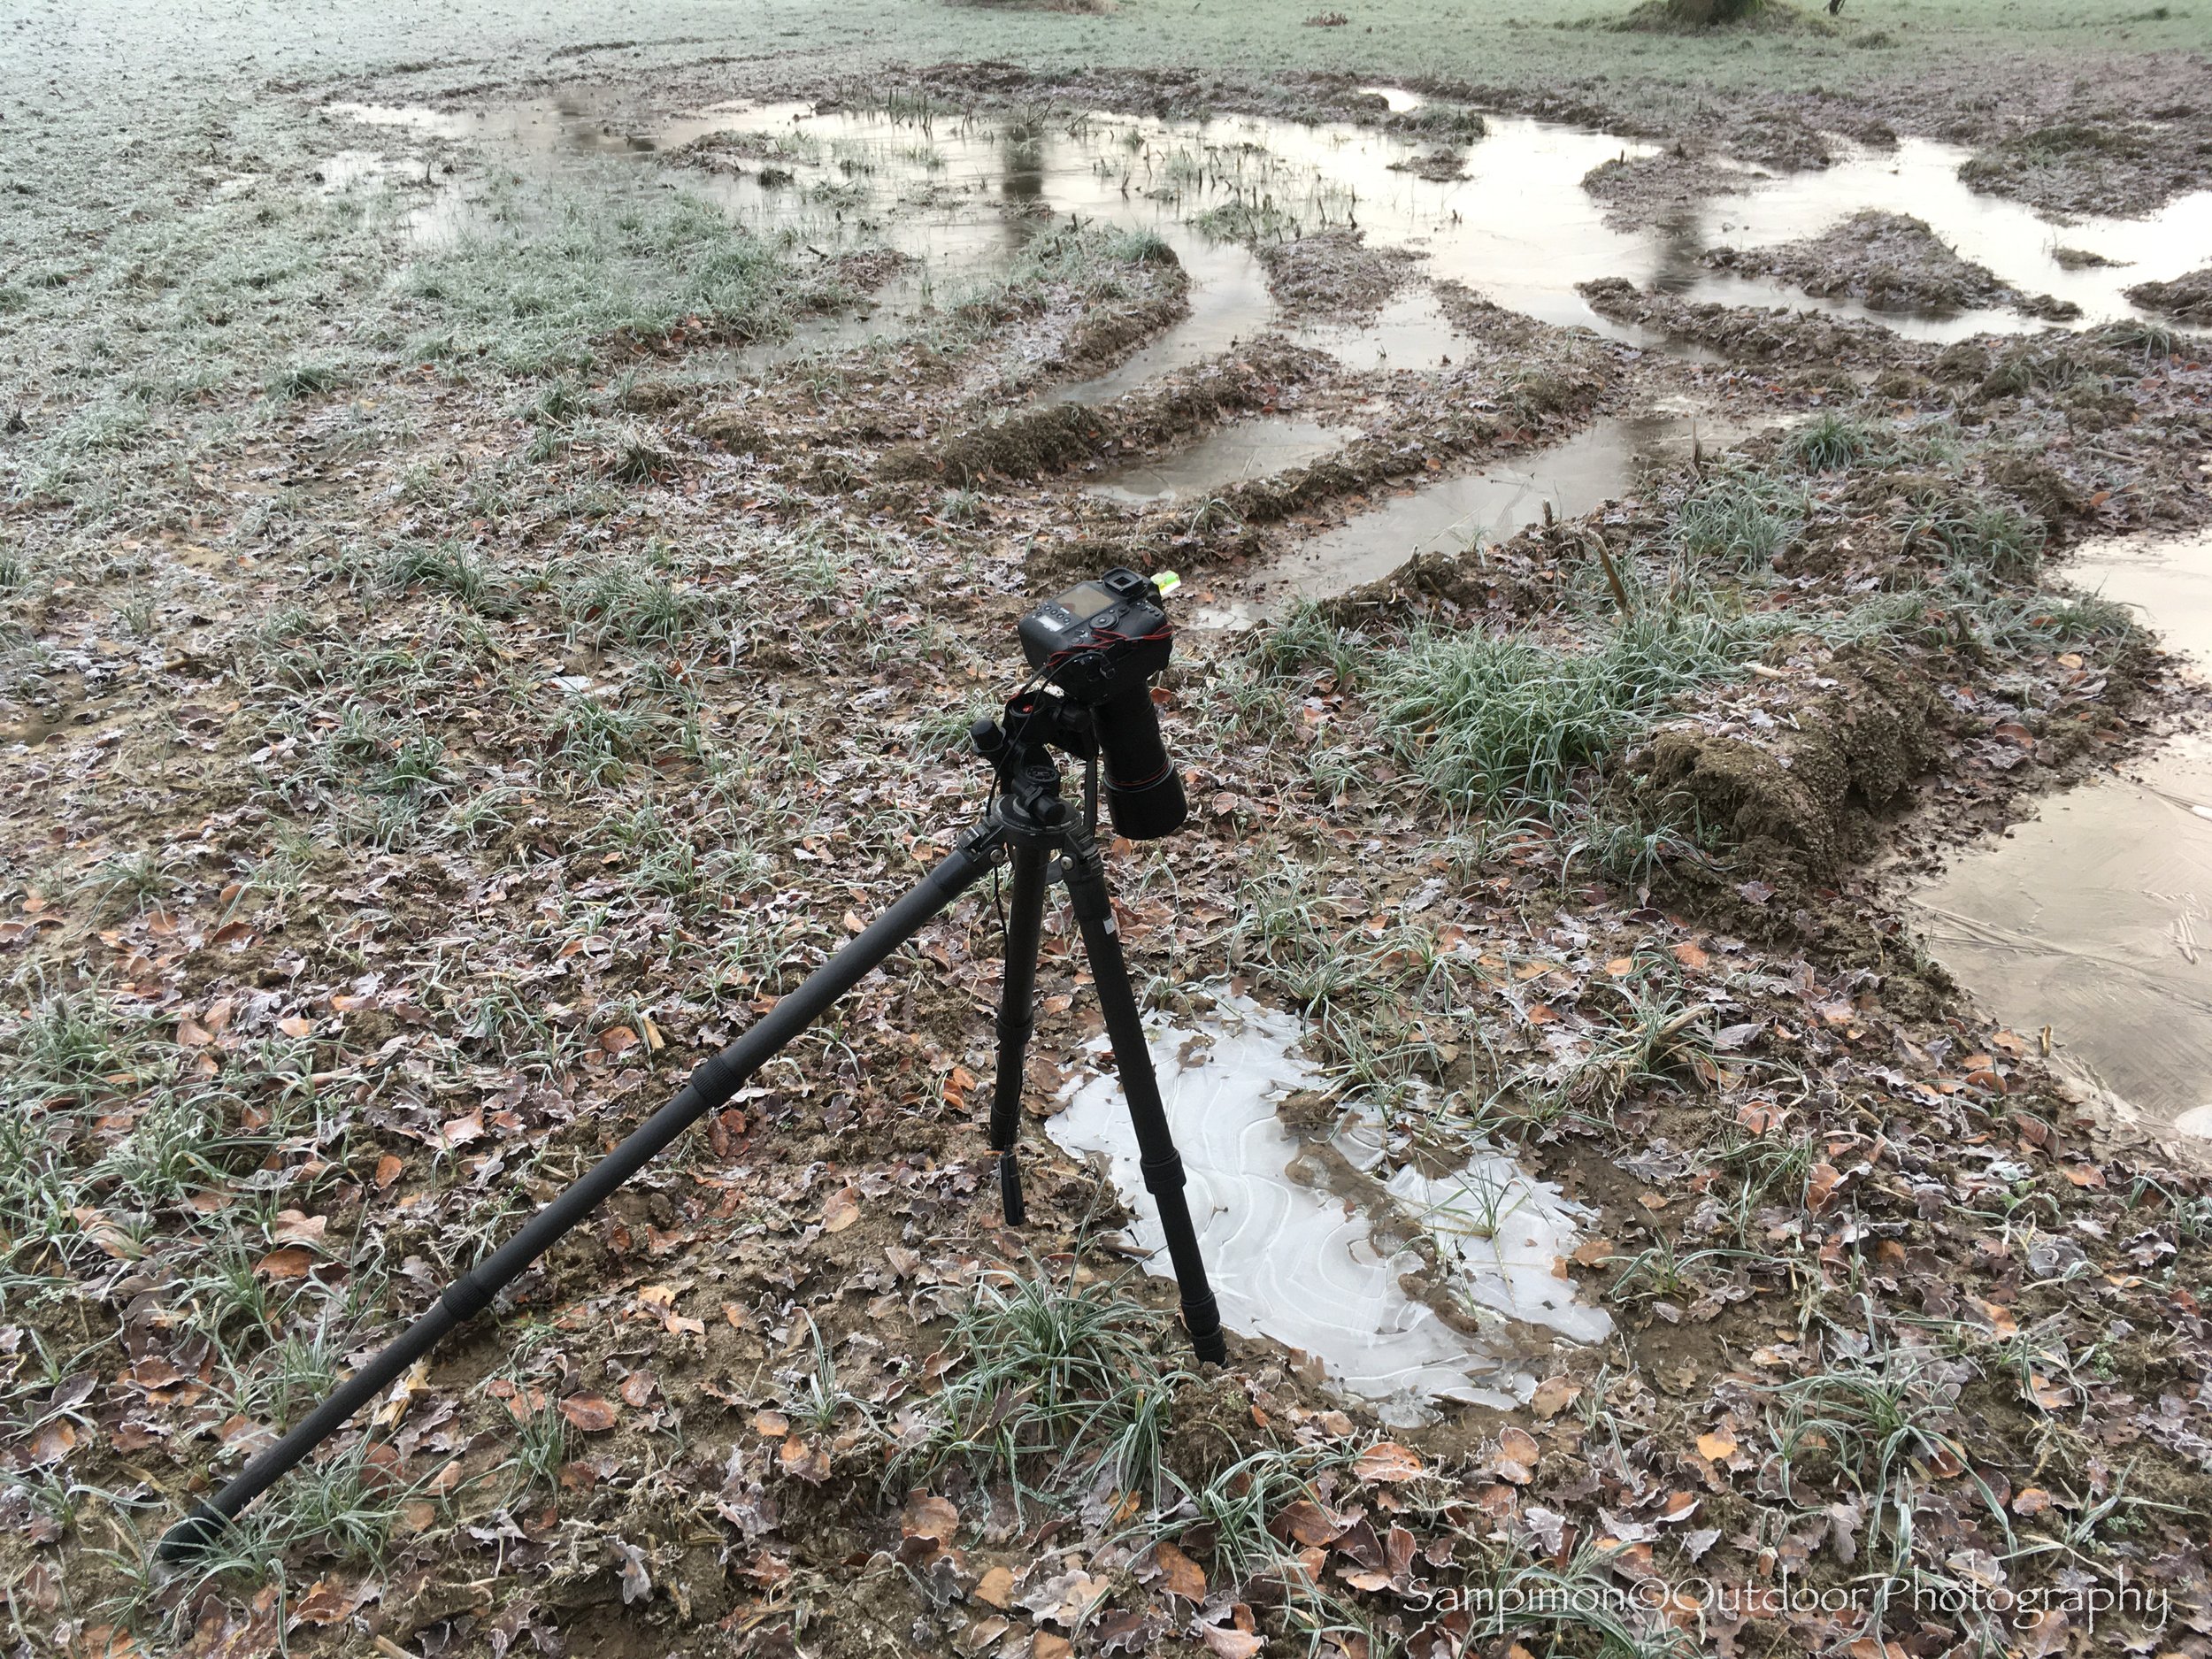
To capture this subject I went to a few well-known sand roads but there were no puddles left or the ice was broken. So plan B and I went to a field to search for some puddles and I was lucky. As you can see on the image on the left, I had found a nice plot of maize land with some deep tracks made by the agricultural machinery during the harvest. It is always a good idea to ask permission from the landowner before you start shooting.
Before I start shooting, I look at all the puddles for beautiful structures in the ice. I prefer to photograph bubbles in combination with dark lines in the white ice. When it has not yet frozen for a long time, it is important to walk carefully because the chance of wet feet is present which I can tell you from experience as well as getting your clothes and equipment covered in mud.
When I have found a subject I set up my tripod over the subject and focus manually using live view and I use also a cable release. The exposure of these images is an important part and also somewhat difficult because the image contains very dark and very light spots. My advise expose for the lightest part and check your histogram which is a helpful tool. In addition to the bubbles and lines in the ice, frozen leaves are also a popular subject to portray, I call these subjects “ice fossils”.
Ice fossil. ISO 100 - 200 mm - f/16 - 1/4 sec.
Good luck with this subject and let me know how it went.
Enjoy!
Otlis Sampimon Outdoor Photography